As a supplier of Single Phase Vacuum Pumps, I understand the importance of proper installation for ensuring the optimal performance and longevity of these essential pieces of equipment. In this blog post, I'll guide you through the process of installing the motor of a single phase vacuum pump, providing you with detailed steps and valuable tips along the way.
Pre - installation Preparations
Before you start the installation process, it's crucial to gather all the necessary tools and materials. You'll need a set of wrenches, screwdrivers, a multimeter for electrical checks, and a torque wrench to ensure proper tightening of bolts. Additionally, make sure you have the appropriate safety gear, such as gloves and safety glasses.
It's also essential to choose a suitable location for the vacuum pump. The area should be well - ventilated to prevent overheating, and it should be level to ensure stable operation. Avoid placing the pump in areas with excessive dust, moisture, or corrosive substances.
Step 1: Unpacking and Inspection
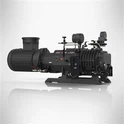
Once you've received your Single Phase Vacuum Pump, carefully unpack it and inspect all the components for any signs of damage during transit. Check the motor, pump body, and all the accessories. If you find any damaged parts, contact our customer service immediately. You can learn more about our Single Phase Vacuum Pump on our website: Single Phase Vacuum Pump.
Step 2: Mounting the Pump
First, place the pump on the pre - selected location. If there are mounting holes on the pump base, align them with the holes on the mounting surface. Use the appropriate bolts and washers to secure the pump. Make sure to tighten the bolts evenly using a torque wrench to the specifications provided in the pump's manual.
Step 3: Electrical Connection
The electrical connection is a critical part of the installation process. Before starting, ensure that the power supply is turned off. The single - phase motor of the vacuum pump usually has three wires: a live wire, a neutral wire, and a ground wire.


- Identifying the Wires: Refer to the motor's wiring diagram, which is usually provided on a label attached to the motor. The live wire is often colored brown, the neutral wire is blue, and the ground wire is green - yellow.
- Connecting the Wires: Connect the live wire to the live terminal of the power supply, the neutral wire to the neutral terminal, and the ground wire to the grounding point. Use wire connectors or terminal blocks to ensure a secure connection.
- Testing the Connection: After making the connections, use a multimeter to check for continuity and proper voltage. Once you've confirmed that the connections are correct, turn on the power supply briefly to check if the motor rotates in the correct direction. If the motor rotates in the wrong direction, swap the connections of the live and neutral wires.
Step 4: Belt or Coupling Installation
There are two common ways to connect the motor to the pump: using a belt drive or a direct coupling.
- Belt Drive: If your pump uses a belt drive, first install the belt on the motor pulley and the pump pulley. Make sure the belt is properly tensioned. You can check the tension by pressing on the belt midway between the pulleys. There should be a slight deflection. If the belt is too loose, it may slip, and if it's too tight, it can cause excessive wear on the bearings.
- Direct Coupling: For a direct - coupled pump, align the motor shaft and the pump shaft precisely. Use a coupling alignment tool to ensure that the shafts are perfectly in line. Misalignment can lead to increased vibration, noise, and premature wear of the pump and motor components.
Step 5: Oil Filling (for Oil - Sealed Pumps)
If you have an oil - sealed rotary vane pump, you need to fill it with the appropriate oil. Our Oil Sealed Rotary Vane Pumps are designed to work with specific types of vacuum pump oil.
- Checking the Oil Level: Locate the oil sight glass on the pump. The oil level should be between the minimum and maximum marks.
- Filling the Oil: Use a funnel to pour the oil into the pump through the oil filler port. Be careful not to overfill the pump.
Step 6: System Leak Check
After completing the installation, it's essential to check for any leaks in the system. You can use a vacuum gauge to measure the vacuum level. If the vacuum level doesn't reach the expected value or drops rapidly, there may be a leak in the system.
- Checking the Connections: Inspect all the pipe connections, flange joints, and seals for any signs of leakage. Tighten any loose connections or replace damaged seals.
- Using a Leak Detector: For more accurate leak detection, you can use a helium leak detector. This is especially useful for high - vacuum applications.
Step 7: Final Testing
Once you've completed all the above steps and confirmed that there are no leaks, conduct a final test of the vacuum pump. Start the pump and let it run for a few minutes. Listen for any abnormal noises, such as rattling or grinding. Check the temperature of the motor and the pump body. If the temperature rises significantly, there may be a problem with the installation or the pump itself.
Tips for a Successful Installation
- Follow the Manual: Always refer to the pump's installation manual for specific instructions and safety guidelines.
- Seek Professional Help: If you're not confident in your installation skills, it's advisable to seek the help of a professional technician.
- Regular Maintenance: After installation, establish a regular maintenance schedule to ensure the long - term performance of the pump.
Special Considerations for Explosion - Proof Vacuum Pumps
If you're installing an Explosion - Proof Vacuum Pump, there are additional safety requirements. These pumps are designed for use in hazardous environments where there is a risk of explosion.
- Installation in Hazardous Areas: Ensure that the pump is installed in a location that meets the requirements of the hazardous area classification.
- Electrical Safety: Use explosion - proof electrical components and wiring methods. All electrical connections must be properly sealed to prevent the entry of explosive gases.
Conclusion
Installing the motor of a single phase vacuum pump requires careful attention to detail and adherence to safety guidelines. By following the steps outlined in this blog post, you can ensure a successful installation and optimal performance of your pump.
If you have any questions or need further assistance with the installation process, or if you're interested in purchasing our Single Phase Vacuum Pumps, feel free to contact us. Our team of experts is always ready to help you with your vacuum pump needs.
References
- Manufacturer's Installation Manual for Single Phase Vacuum Pumps
- Electrical Installation Standards for Single - Phase Motors
- Safety Guidelines for Vacuum Pump Installation in Hazardous Areas