Maintaining an oil vacuum system is crucial for its efficient and long - lasting operation. As a supplier of Oil Vacuum Systems, I understand the importance of proper cleaning and maintenance. In this blog, I'll guide you through the process of cleaning an oil vacuum system, ensuring that it functions at its best.
Understanding the Oil Vacuum System
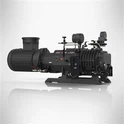
Before we dive into the cleaning process, let's briefly understand what an oil vacuum system is. An Oil Vacuum System is a complex piece of equipment used in various industrial and laboratory applications. It works by creating a vacuum using oil as a sealing and lubricating medium. There are different Vacuum Pump Types within an oil vacuum system, such as rotary vane pumps, which are commonly used due to their reliability and efficiency.
Preparation for Cleaning
Cleaning an oil vacuum system requires careful preparation. First, gather all the necessary tools and materials. You'll need safety equipment like gloves and goggles to protect yourself from oil and debris. Additionally, prepare a container to collect the used oil. It's important to have a clean workspace to avoid any contamination during the cleaning process.
Next, shut down the oil vacuum system and disconnect it from the power source. This is a crucial safety step to prevent any electrical accidents. Allow the system to cool down completely, as the oil and components can be very hot after operation.
Draining the Used Oil
The first step in the cleaning process is to drain the used oil from the system. Locate the oil drain valve, which is usually at the bottom of the pump. Place the container under the drain valve and slowly open it. Let the oil drain completely into the container. It's important to handle the used oil properly, as it may contain contaminants and should be disposed of according to local environmental regulations.
Once the oil has drained, close the drain valve tightly. Inspect the drained oil for any signs of excessive contamination, such as metal particles or sludge. If you notice any abnormal substances in the oil, it could indicate a problem with the system, such as wear and tear of internal components.
Cleaning the Oil Reservoir
After draining the oil, it's time to clean the oil reservoir. Remove the reservoir cover carefully. You can use a soft brush or a lint - free cloth to clean the inside of the reservoir. Gently scrub the walls and bottom of the reservoir to remove any accumulated dirt, sludge, or oil residue.
For stubborn stains or deposits, you can use a mild cleaning solvent recommended by the system manufacturer. Apply a small amount of the solvent to the cloth or brush and continue cleaning. Be careful not to use too much solvent, as it may leave a residue that could affect the performance of the system.
Rinse the reservoir thoroughly with clean water to remove any remaining solvent or debris. Make sure to dry the reservoir completely before reinstalling the cover. Moisture in the reservoir can cause corrosion and damage to the system over time.
Cleaning the Filters
Filters play a vital role in an oil vacuum system by removing contaminants from the oil. Over time, filters can become clogged with dirt and debris, reducing the efficiency of the system. Locate the filters in the system, which are usually near the oil inlet or outlet.
Remove the filters carefully. Depending on the type of filter, you may be able to clean it or it may need to be replaced. For reusable filters, you can use compressed air to blow out the dirt and debris. Hold the filter firmly and direct the compressed air from the clean side to the dirty side to ensure effective cleaning.
If the filter is damaged or too clogged to clean, it should be replaced with a new one. Always use filters that are compatible with your oil vacuum system to ensure proper filtration and performance.
Cleaning the Pump Components
The pump is the heart of the oil vacuum system, and its components need to be cleaned regularly to maintain optimal performance. Remove the pump cover and access the internal components, such as the rotors, vanes, and valves.
Use a soft brush to clean the components gently. Pay special attention to the vanes, as they can become stuck or damaged due to contamination. If the vanes are dirty or worn, they may need to be replaced.
Inspect the valves for any signs of damage or blockage. Clean the valves using a suitable cleaning solution and a small brush. Make sure the valves open and close freely after cleaning.
Reassemble the pump components carefully, following the manufacturer's instructions. Ensure that all components are properly aligned and tightened to prevent any leaks.
Inspecting and Lubricating Seals and O - rings
Seals and O - rings are essential for preventing oil leaks in the oil vacuum system. Inspect the seals and O - rings for any signs of wear, damage, or aging. If you notice any cracks, tears, or deformation, replace the seals and O - rings immediately.
Before reinstalling the new seals and O - rings, apply a thin layer of lubricant recommended by the manufacturer. This will help ensure a proper seal and reduce friction during operation.
Refilling with New Oil
Once all the components are clean and dry, it's time to refill the system with new oil. Use the type of oil recommended by the system manufacturer. Pour the oil slowly into the oil reservoir through the oil fill port.
Check the oil level indicator to ensure that the oil level is within the recommended range. Overfilling or underfilling the oil can affect the performance of the system. Once the oil level is correct, close the oil fill port tightly.
Testing the System
After refilling the oil, reconnect the oil vacuum system to the power source. Turn on the system and let it run for a few minutes. Listen for any unusual noises or vibrations, which could indicate a problem with the system.
Check for any oil leaks around the pump, reservoir, and connections. If you notice any leaks, shut down the system immediately and inspect the affected area. Tighten any loose connections or replace the faulty seals or gaskets.
Monitor the system pressure and performance. If the pressure is not within the normal range or the system is not operating as expected, there may be an underlying issue that needs to be addressed. Refer to the system manual or contact a professional technician for further assistance.
Regular Maintenance and Cleaning Schedule
To keep your oil vacuum system in top condition, it's important to establish a regular maintenance and cleaning schedule. The frequency of cleaning depends on the usage of the system and the operating environment.
For systems that are used frequently or in dirty environments, it may be necessary to clean the system every few months. For less - used systems, an annual cleaning may be sufficient. Regularly inspect the system for any signs of wear, damage, or contamination, and address any issues promptly.
Conclusion
Cleaning an oil vacuum system is a crucial part of its maintenance. By following the steps outlined in this blog, you can ensure that your system operates efficiently and has a long lifespan. As a supplier of Oil Vacuum Pump Systems, I'm committed to providing high - quality products and helping our customers maintain their systems properly.
If you're interested in purchasing an oil vacuum system or need further advice on system maintenance, don't hesitate to contact us. We're here to assist you with all your oil vacuum system needs.


References
- Manufacturer's manuals for oil vacuum systems
- Industry standards for oil vacuum system maintenance
- Environmental regulations for used oil disposal